
Growing up in the Midwest, a box of Fannie Mae caramels was the ultimate special occasion treat in our home. The first time I made these homemade versions, the familiar buttery aroma filled my kitchen and transported me straight back to childhood. While candy-making might seem intimidating, this recipe breaks it down into simple steps that deliver professional-quality caramels with that signature creamy, chewy texture that made Fannie Mae famous.
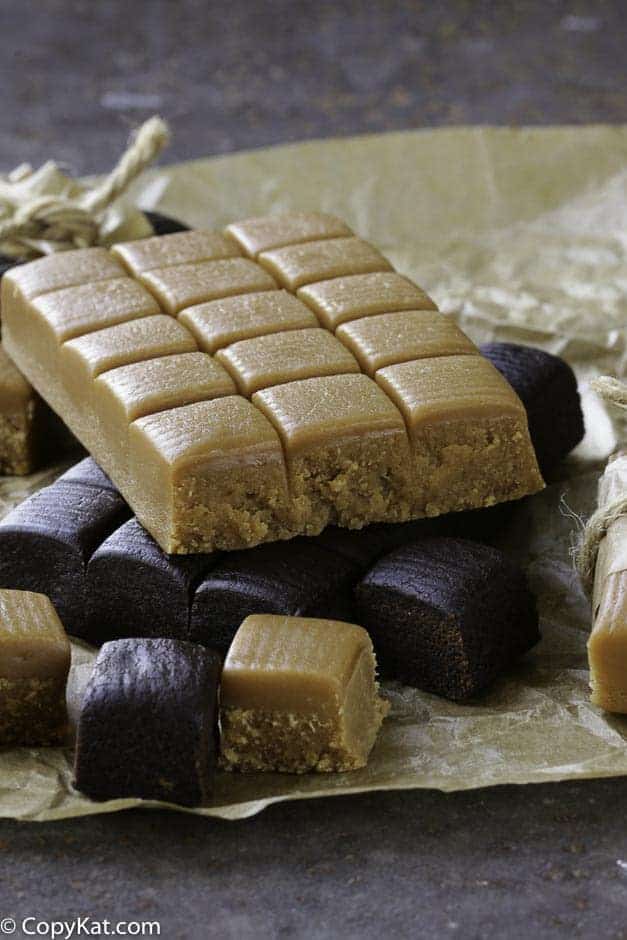
Table of Contents
Why This Recipe Works
The secret to these caramels’ exceptional texture and flavor lies in the precise combination of sugars and dairy. Using both sweetened condensed milk and regular milk creates the perfect creaminess, while the gradual cooking process allows the sugars to caramelize properly without burning. The slow cooling period is equally important, allowing the caramels time to develop their signature chewy yet soft consistency that melts in your mouth.
Ingredients
For the Caramels
- Sugar – Forms the base of the caramel and provides sweetness
- Light corn syrup – Prevents crystallization and creates smooth texture
- Sweetened condensed milk – Adds creamy richness and helps achieve proper consistency
- Milk – Provides additional creaminess and helps control thickness
- Whipping cream – Creates the luxurious mouthfeel of professional caramels
- Butter – Contributes rich flavor and velvety texture
- Vanilla extract – Enhances the caramel flavor with aromatic warmth
- Chopped nuts – Optional addition for texture and flavor contrast
For Finishing (Optional)
- Wax paper squares – Alternative for wrapping individual pieces
- Tempered dipping chocolate – Creates a professional chocolate-covered caramel
Instructions
Preparing the Pan
- Generously butter a 9×13 baking pan
- Set aside in a draft-free area of your kitchen
Making the Caramel
- In a heavy 6-quart Dutch oven, combine sugar, corn syrup, sweetened condensed milk, milk, whipping cream, and butter
- Place over medium heat and stir occasionally with a wooden spoon until mixture comes to a boil
- Attach a candy thermometer to side of the pot, ensuring tip doesn’t touch bottom
- Reduce heat to medium-low to maintain a steady simmer
- Stir constantly with a wooden spoon, scraping the bottom and sides to prevent scorching
- Cook until mixture reaches 240°F (soft ball stage)
- Remove from heat immediately
- Stir in vanilla extract and nuts (if using)
- Pour mixture into prepared pan without scraping pot (any scorched bits will affect texture)
- Allow caramel to cool at room temperature
Setting and Cutting
- Let caramels set overnight at room temperature
- Once completely set, cut into 1-inch rectangles or squares
- Wrap individually in wax paper squares or dip in tempered chocolate
Fannie Mae Caramels
Ingredients
- 2 cups light corn syrup
- 14 ounces sweetened condensed milk
- 1 1/2 cups milk
- 1 cup whipping cream
- 1 cup butter
- 4 cup sugar
- 2 teaspoon vanilla
- 2 cup chopped nuts if desired
- Tempered dipping chocolate if preferred or wax paper cut into rectangles
Instructions
- Butter a 9X13 baking pan. In heavy 6 quart Dutch oven, combine sugar, corn syrup, condensed milk, milk, cream and butter. Place over medium heat and stir occasionally with wooden spoon until comes to boil. Clip on candy thermometer.
- Please note it can take the sugar a long time to reach the proper temperature, be patient.
- Cook stirring constantly until reaches 240 degrees or soft ball stage. Remove from heat. Stir in vanilla and nuts. Pour without scraping into pan. Allow to stand overnight. Cut into 1-inch rectangles or squares. Wrap in wax paper or dip in chocolate.

I cook to 240 but they were so hard I couldn’t cut them
It sounds like the sugar may have crystalized. It is possible some water may have come into contact with the candy as it was cooking.
I have been making these for years and you need to be patient and it can sometimes take over an hour for the right consistency and to get to soft ball stage. I find that once I reach soft ball, I then continue to cook and stir for another few minutes. This helps to not have them stick to the wax paper when I wrap. Every year I make these for Xmas to give as gifts to friends and they now expect them, LOL.
I made these wonderful candies for the first time. They set overnight but the middles are still just a bit soft. Should I let them sit longer, put them in the frig or let it be?
Putting them in the fridge will help them harden up a bit.
Do you have recipe for Fannie mae dixies?
Should the whipping cream be heavy or regular?
What type of milk should be used? Whole? 2%? 1%? Or non fat?
Looking fwd to making these tasty treats!
I always use whole milk when cooking. My recipes are designed with whole milk in mind.
Thanks for your quick response!
Fingers crossed!
hi is that one and a half cups milk or a half cup milk not sure in recipe
One and a half cups
making for years takes total cooking time over 1 hour
Thank you. Are you at a higher altitude?
Just made these and they are wonderful! You really have to be patient in cooking this, med heat and cook until a nice golden brown ( 240 °) My grandsons are here and they can’t stop eating these Awesome recipe
Candy making takes a lot of time. I know when I make peanut brittle it can take about 35 to 40 minutes per batch. I am glad you enjoy the recipe.
I cooked these at 240 for 15 min and still didn’t come out to caramel.. There is to much milk or condensed milk in these. The product is white gooey not cooked mess.
I am sorry to hear these didn’t turn out well for you. I know sometimes candy making can be challenging.
If the mixture is still juicy what am I doing wrong and what can I do to fix it!!??? Am I to put it in the fridge or leave it on counter top wrapped or unwrapped.. Please help..
I am going to guess maybe this didn’t reach up to proper temperature. Sometimes thermometers can be off. If you put it in the refrigerator it should have hardened somewhat.
You can test your candy thermometer by putting it in boiling water. It should read 212 degrees. If not, either add or subtract the temp to make the adjustment.
Can you make these without the nuts?
yes, I always do
I am wondering if I can make this recipe without nuts? My family and I are allergic to tree nuts. Just curious.. thank you! 🙂
yes, I always do
How do you think these would come out if you put them in the small mini cupcake paper cups? I put fudge in them that works out fine. Do you think these would these be too sticky to come off of the paper cups? Just a thought for a better way.
Use parchment paper cut the paper to size
How do you think these would come out if you put them in the small mini cupcake paper cups? I put fudge in them that works out fine. Do you think these would these be too sticky to come off of the paper cups? Just a thought for a better way.
Will the recipe turn out if I don’t use nuts – allergies?
I MADE THE CARAMELS, WAITED OVER NIGHT AND THE TASTE WAS GOOD, BUT THE PRODUCT WAS SOUP???i HAVE TWO DIFFERENT CANDY THERMOMETERS, I HAVE EXPERIENCE WITH CANDY MAKING, WHAT HAPPENED??? IS THE RECIPE CORRECT?
The recipe is correct. I am sorry this happened to you. I am certain you have great candy making experience, and you do well with candies. I am sorry that they did not set up. This recipe does work, but it didn’t, maybe some tiny bit of water got in there and messed up the process. I wish I could give you a better answer. Again, I am very sorry you had a bad experience.
MAYBE IT WAS TOO WARM WHERE YOU SET THEM.
I have been making these for years. I line my 9×13 pan with non-stick foil that I can just lift out of the pan and peel off of the caramels. I have also found that a pizza cutter is an easy way to cut them.
One of the best caramels I have ever ate. It was a big hit with everyone. Only problem was trying to get the slab out of the dish after the caramel was set up.
I covered the caramels pieces with chocolate and added some nuts on top.
Just need to know a better way of getting the slab out of the glass dish.
You may want to try to line that pan with waxed paper so you can just lift out the waxed paper ~stephanie
you probably didn’t let them cool long enough. I make these every year, with the nut, and they are never stringy. And maybe you didn’t cut the pieces all of they way down.
I made these…..even went to 245degrees because I wanted to ensure I would be able to wrap them individually. They were very difficult to cut and stringy when I tried to pull them apart. I did omit the nuts…..so my question is this: Is it supposed to be a very soft caramel? If so then the texture stands to reason. With the nuts it would stand up a litle better. Thanks…….