
The first time I discovered that restaurant-quality, perfectly crisp, and flat bacon could be made at home without any mess, it completely changed my breakfast game. Like many, I was used to the stovetop method—dodging grease splatters while trying to flip curling strips of bacon in a crowded pan. Then I learned the secret that professional kitchens have known for years: baking bacon in the oven is not only easier, but it produces superior results. This simple technique delivers consistent, evenly cooked bacon that’s ideal for everything from breakfast platters to BLT sandwiches, all while keeping your stovetop (and your clothes) clean and grease-free.
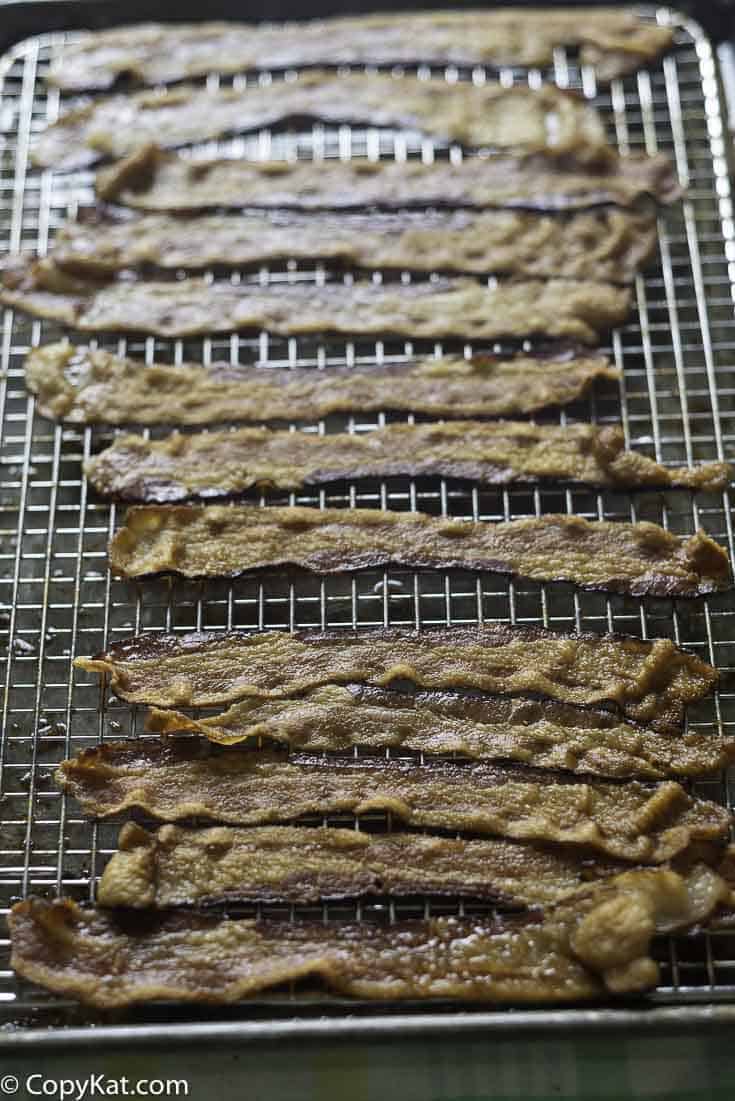
Table of Contents
Why This Recipe Works
The magic of oven-baked bacon lies in the even heat distribution that surrounds each strip. Unlike stovetop cooking where parts of the bacon may cook faster than others, oven baking ensures uniform cooking from edge to edge. The elevation on a wire rack (if used) allows hot air to circulate around the bacon while the fat drips away, resulting in perfectly crisp strips without any soggy spots. The controlled temperature environment prevents burning, and the hands-off cooking method means you can prepare the rest of your meal while the bacon cooks to perfection. It’s truly a foolproof method that delivers restaurant-quality results every time.
Ingredients
- Bacon – The star of the show; works with any variety (thick-cut, maple, peppered, etc.)
Step-by-Step Instructions
- Preheat your oven to 400°F (200°C).
- Line a rimmed baking sheet or jelly roll pan completely with aluminum foil, making sure to cover the edges. This is crucial for easy cleanup.
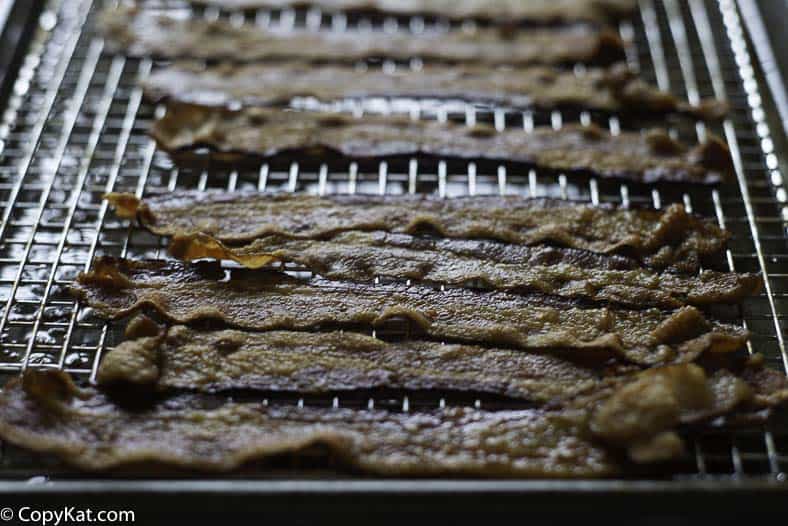
- If using a wire rack, place it on top of the foil-lined baking sheet. This optional step allows the fat to drip away, resulting in crispier bacon.
- Arrange bacon slices in a single layer on the foil or wire rack, making sure they don’t overlap. Leave about ¼ inch of space between each slice to ensure even cooking.
- For flat bacon, you can place a second baking sheet on top of the bacon to prevent curling (optional).
- Place the baking sheet on the middle rack of your preheated oven.
- Bake for 15-17 minutes for regular-cut bacon. For thick-cut bacon, you may need 20-25 minutes. The exact time will depend on your preferred crispness and the thickness of your bacon.
- Check the bacon at the 12-minute mark to monitor its progress. Bacon can go from perfectly crisp to burnt quickly.
- Once the bacon reaches your desired level of crispness, remove the baking sheet from the oven.
- Using tongs, transfer the bacon to a plate lined with paper towels to drain excess grease.
- Let cool slightly before serving or using in recipes.
- If not using immediately, store cooled bacon in an airtight container in the refrigerator.
Perfect Baked Bacon
Ingredients
- 1 pound bacon
Instructions
- Preheat your oven to 400 degrees. Line a cookie sheet with foil, you can leave the foil a little crinkled so the grease doing pool under the bacon.
- Do not use a flat cookie sheet, use a bar pan. A flat cookie sheet will get you a mess in your oven, as the grease forms it will drip down the pan.
- Lay out bacon one strip at a time on the cookie sheet. The bacon should not touch. You can leave about a quarter inch between of space between each slice of bacon.
- Place cookie sheet with bacon into the oven and bake for 15-17 minutes. When the bacon is browned and crispy, you will drain it on paper towels. Now wasn’t that easy?
Video
Notes
What to do with all of this bacon goodness
- You can precook bacon for a whole week on the weekend, and simply reheat just before serving.
- Store cooked bacon in an airtight plastic bag, and use as you like
- Be sure to save the bacon grease for cooking in other recipes.
Nutrition
Storage and Reheating
Storage: Allow bacon to cool completely, then store in an airtight container in the refrigerator for up to 5 days. Place paper towels between layers to absorb any excess grease.
Freezing: Cooked bacon freezes beautifully. Place cooled strips between layers of parchment paper in a freezer-safe container or ziplock bag. Freeze for up to 3 months.
Reheating: Microwave refrigerated bacon between paper towels for 10-15 seconds per slice. For crisper results, place in a 350°F oven for 2-3 minutes. From frozen, add an additional 30 seconds in the microwave or 2 minutes in the oven.
Serving Suggestions
Perfect baked bacon enhances countless dishes:
- Classic breakfast with eggs and toast
- BLT sandwiches with extra crispiness
- Crumbled over salads for added flavor and texture
- Mixed into pasta dishes like carbonara
- Wrapped around dates or scallops for elegant appetizers
- Chopped and added to baked potatoes
- As a topping for burgers or grilled cheese sandwiches
Uses for Baked Bacon
- Meal Prep: Cook a full batch on Sunday for quick breakfast additions all week
- Party Planning: Easily make large quantities for brunch gatherings
- Recipe Ready: Have perfectly flat, crisp bacon ready for sandwiches and wraps
- Uniform Pieces: Get consistently sized pieces for topping deviled eggs or hors d’oeuvres
- Bacon Bits: Chop cooled bacon for homemade bacon bits to top salads and soups
Bacon Cooking Tips
- Select the Right Pan: Always use a rimmed baking sheet to prevent grease from spilling into your oven
- Line Properly: Ensure foil extends up all sides of the pan to contain all the grease
- Thickness Matters: Adjust cooking time based on bacon thickness (thin slices: 12-15 minutes, regular: 15-17 minutes, thick-cut: 20-25 minutes)
- Save the Grease: Strain cooled bacon fat through a fine-mesh sieve into a jar and refrigerate for future cooking (up to 1 month)
- Consistent Results: For professional-looking bacon, avoid overcrowding the pan
Instead of a conventional oven, we use a NuWave oven. The fat drips away below. We just wipe it out. Clean up is not a hassle. The bacon comes out really nice and tastes more like ham.
Instead of a conventional oven, we use a NuWave oven. The fat drips away below. We just wipe it out. Clean up is not a hassle. The bacon comes out really nice and tastes more like ham.
Beginning early, oven should be 250 degrees. Bacon placed on your removal oven broiler where the grease drips to the bottom of the pan and there is no splashing and its actually crispy and not greasy. Just my thoughts….
I haven’t found the bacon to be greasy. Crinkling the foil means the bacon doesn’t sit flat. I am clear about draining it on paper towels. I chose to present it this way because I don’t know who has broiler pans, and who has cooling racks, I wanted to demonstrate how to do this with the fewest items possible. I appreciate your comments. I don’t think that starting my oven at 250, would give me a 15-17 minute cooking time. I think my oven would use most of that time to get to the higher temperature.
I’m sorry about your loss. Janice
I have learned that if you put the cooked bacon on a rack with paper towel under the rack the bacon stays crisper.
I bake mine on a broiling pan so the fat just drips below.
Sorry about your loss. Polly
I bake mine on my large broiler pan. Spray first with olive oil spray. Lay it flat thick or thin and broil it at low or hi depending on the thickness for 12-15 minutes. Take out and lay flat on paper towles to drain and crisp. Perfect bacon everytime.
I also do the bacon in the microwave on bacon holders. They are triangle shaped and you drape each piece of bacon over the top and it cooks draining into the holder. 5 minutes and they are done. This is even faster.
This is the ONLY way I make bacon. It is an easy clean up. However, I do flip the bacon 1/2 way through the cooking.
I always make bacon in the oven. The only differences I do are, lay the aluminum foil flat so it catches the grease and I place a cookie cooling rack over the aluminum foil and lay the bacon that. It also prevents you from having to flip the bacon as it is raised up and allows the heat to travel on either side of the bacon. It is healthier because the bacon doesn’t lay in the fat either.
This is exactly how i do it as well! It comes out perfect every time!
This is the only way I will make Bacon anymore. I make 2 lb at a time. Because of this technique I am free to move about my kitchen and do other things instead of dodging flying bacon grease.
Love the photo. It makes me want to dive in! Baking bacon is the best way I’ve found to cook the evil temptress. I line a jellyroll pan with foil and put a cooling rack on top and put the bacon on that. This way the bacon does’t sit in the rendered fat.
I also have been doing this for years. I have never had a problem with it making a mess in my oven. Never a splatter at all. I do put the bacon on my cookie cooling rack, so the fat drips down. I do an entire pound at a time and freeze it so my mom can have her favorite BLT’s whenever she chooses.
Well, I’ve did do this until I realized I was cleaning my oven more often. Between baking the bacon and doing the chicken breasts my oven was a mess.
I love baked bacon and – for some reason – I always forget to do that! Thanks! Like you – if I cook it in a pan it splatters EVERYWHERE!
i’ve been doing this for a few years. the only downside . . . we consume a lot more bacon 😉
We have been cooking our bacon in a pan like this but rather than in the oven, we do it in the gas grill. No smoke from spatters and even less bacon smell in the house! More and more I have making large brunches for family and friends and cooking the bacon on the grill frees up oven space for the Dutch Babies and breakfast casseroles or bakes French Toast.
I bake mine on a rack placed over my pan so it isn’t sitting in grease.
I bake mine on a rack placed over my pan so it isn’t sitting in grease.
If you turn the pan around half way through, it cooks more evenly (my oven is not that even).
Great tip, a lot of ovens aren’t that even. I heard someone tell me they keep you oven thermometers in their oven, one in the front and one in the back.